

How to create a Bitcoin wallet with Electrum
The advice provided on cryptocurrency and/or bitcoin trading is for informational and educational purposes only and does not constitute financial advice or investment recommendations. The cryptocurrency market, including bitcoin, is highly volatile and poses significant risks. Any investment decision or transaction made based on the provided information is the sole responsibility of the user. We strongly recommend conducting thorough research, consulting professional financial advisors, and considering your own financial situation and risk tolerance before engaging in any cryptocurrency and/or bitcoin-related activities. We are not responsible for any loss or damage resulting from the misuse of the provided information.
———————–
Creating a Bitcoin wallet on Electrum is simple. If you follow this tutorial step by step and do it in a safety place, your wallet will be ready to use quickly.
We recommend Brave browser due to its level of security. From there, go to Electrum website to generate your bitcoin wallet.
On Electrum.org, scroll down until you find the click button to download it. Match the version of Electrum with your operating system on your computer.
Once the installer is downloaded, find the file in your folder and execute it.
From here, follow the instructions carefully:
Step 1: Once Electrum is installed, you must disconnect the internet and cover the cell phone and computer’s camera.
Once the program is active, follow the next steps:
Step 2: Open the wallet

Step 3: Name the wallet (just to identify it) and click Next.

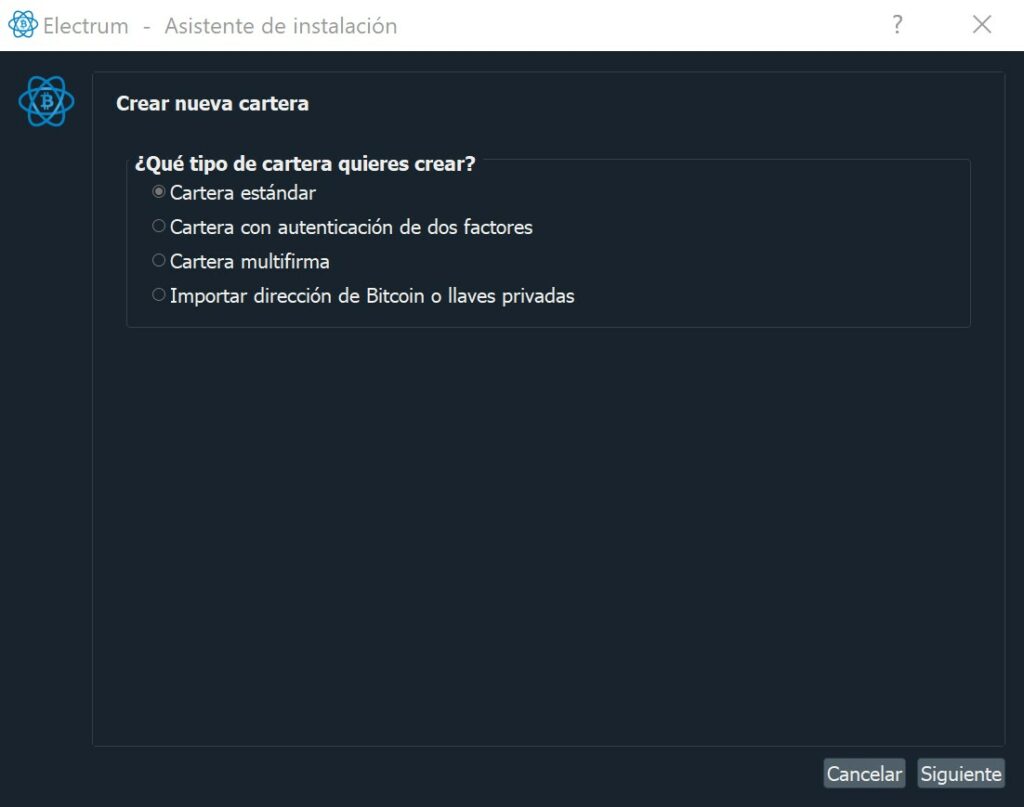
Step 4: Click on “Standard Wallet” in the “Create new portfolio” section.
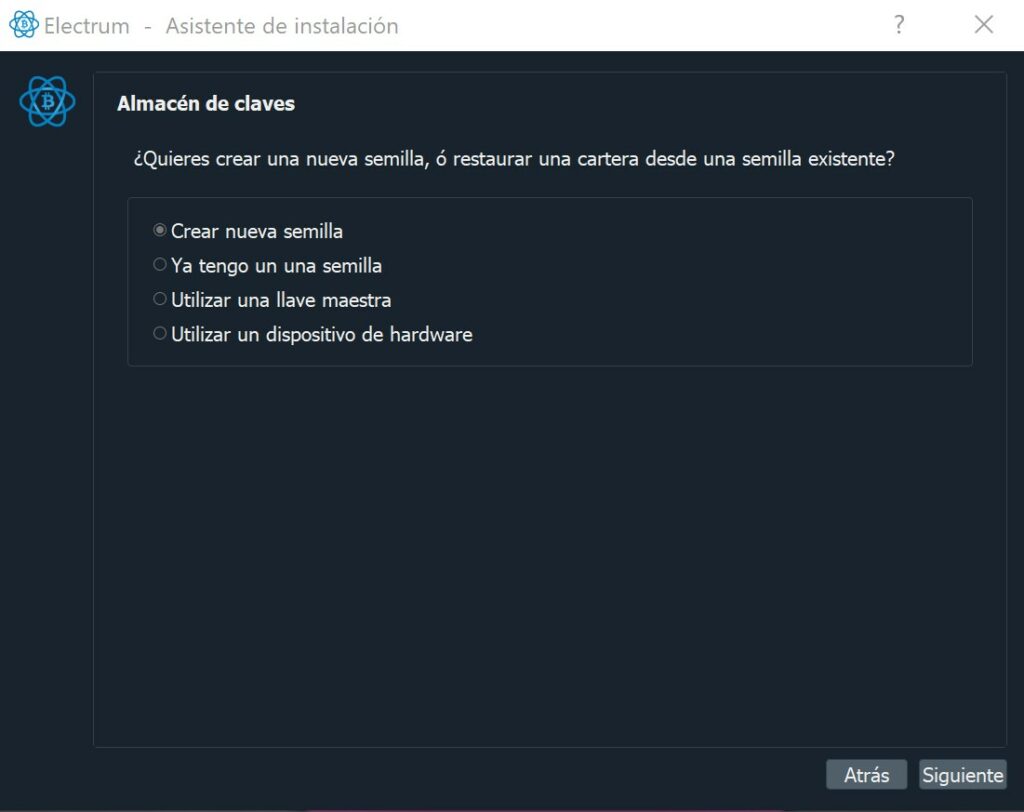
Step 5: Click on ” Create a new seed”.
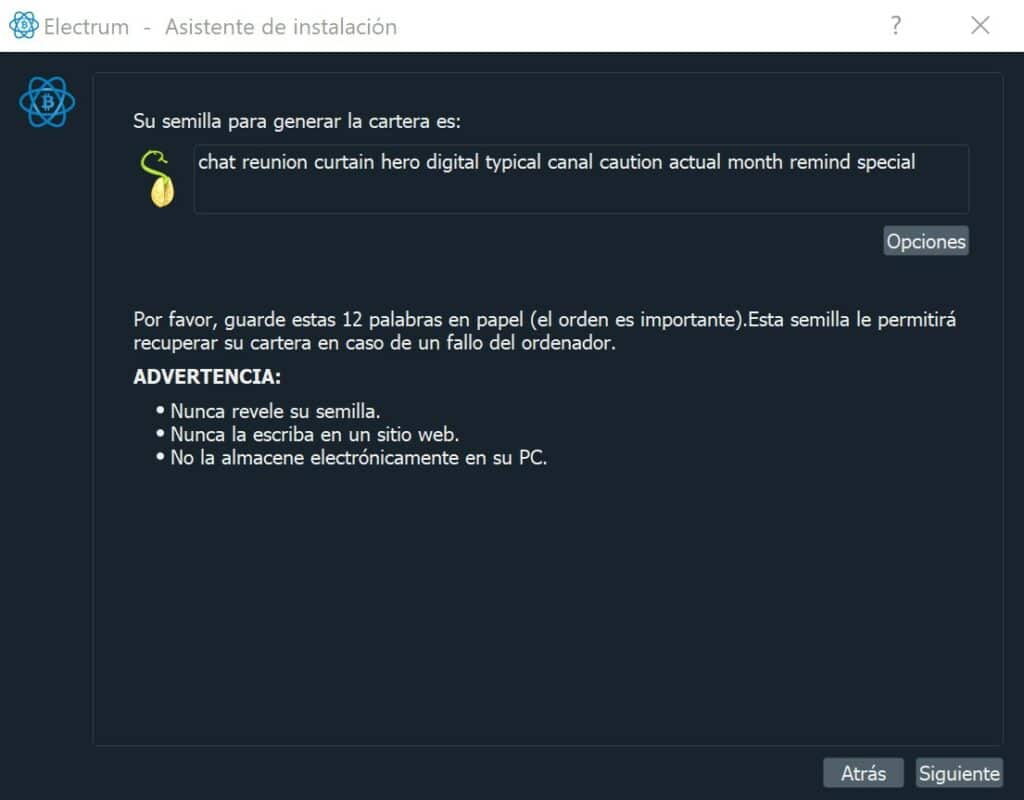
Step 6: The 12 security words will appear. You must write them down in the correct order. We strongly recommend to previously number a list of twelve so the words are written in its proper order.
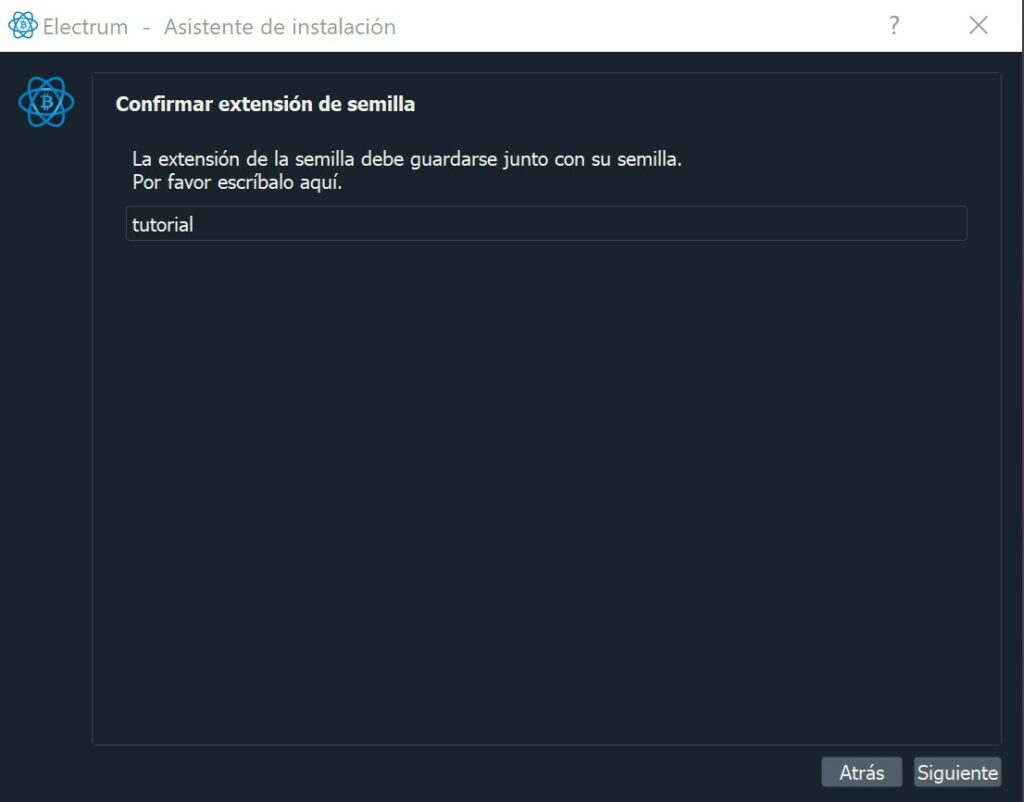
Step 7: Bonus. As an option, we can add an extra word (passphrase) to increase the wallet’s security. If this suits you, check the option ” to extend seed with custom words + OK
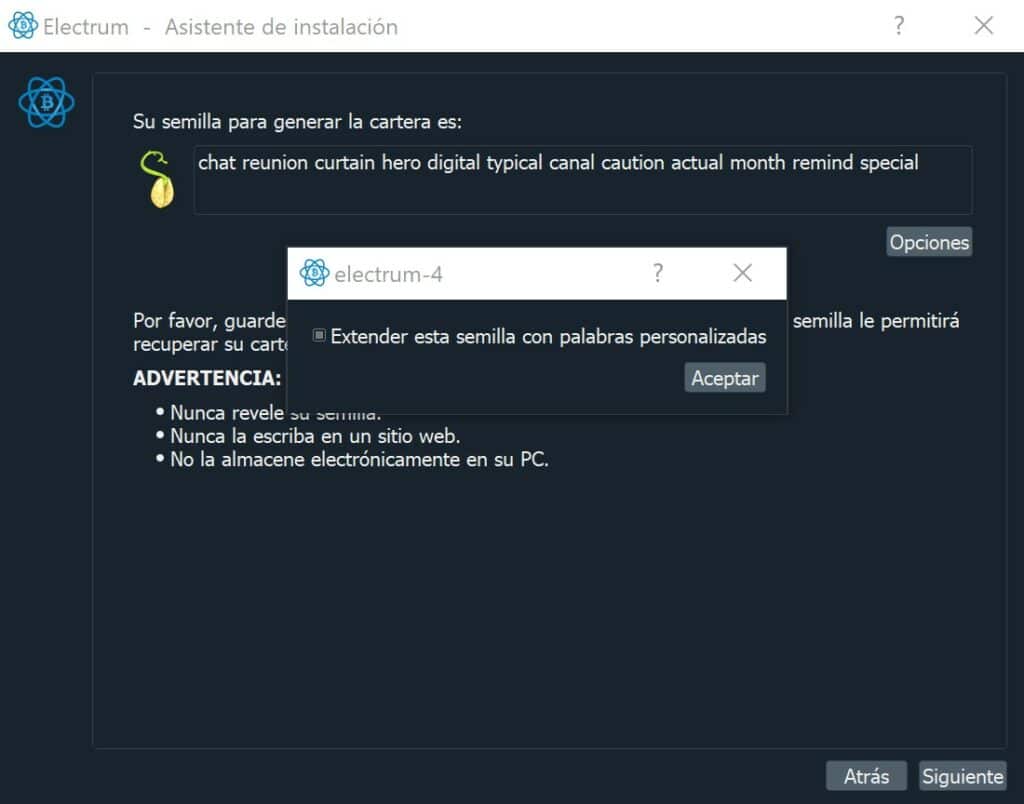
Seed extension and we note an extra word.

Step 8: Confirm the seed phrase by manually typing its twelve words in the right order. This way, the program makes sure that you have written down the words correctly.
If we added a passphrase before, it will be required again.
Last step: We set a secure password.
This password will give us access to the wallet as long as we saved it on the computer, It is not linked to our seed phrase words, so we do not need to engrave it on the DIY Material plate.


At this point we have already created fully secure wallet thanks to its mnemonic phrase.
The wallet is ready to use safely.
Before using it, close the application and connect back to the internet. Open Electrum again. This time it connects to a public server to update the balance of your wallet, which at this time is zero.
To receive bitcoin we go to the Receive tab where it shows several addresses where to receive.
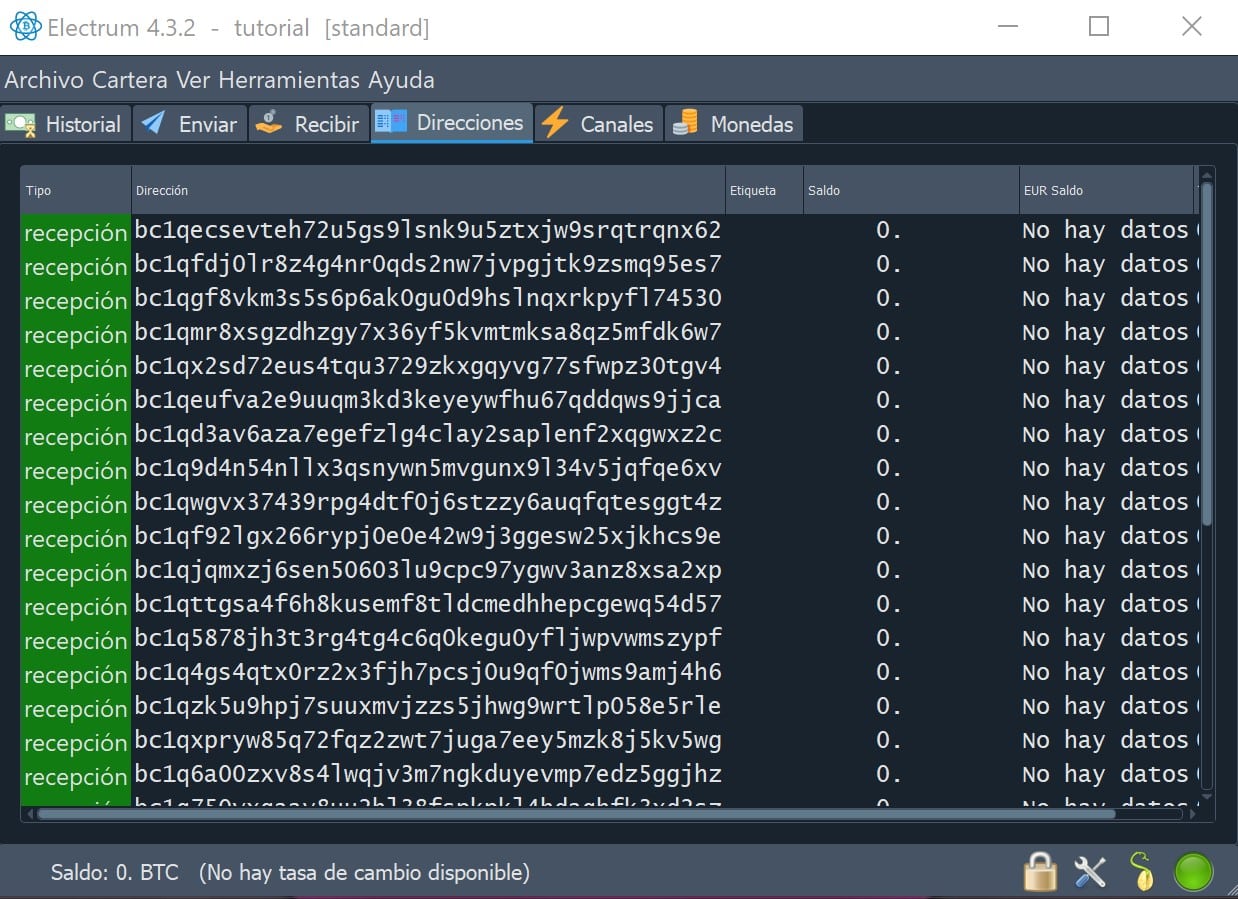
With these addresses we can receive bitcoin in our wallet from an exchange or from another wallet. The public address could be shared to anyone so they can send us btc.
Do not hesitate to share this public address.
Congratulations, you own a bitcoin wallet with a private key safely engraved on an extremely resistant steel plate. At the same time you have 12 words (plus the Passphrase) as security.
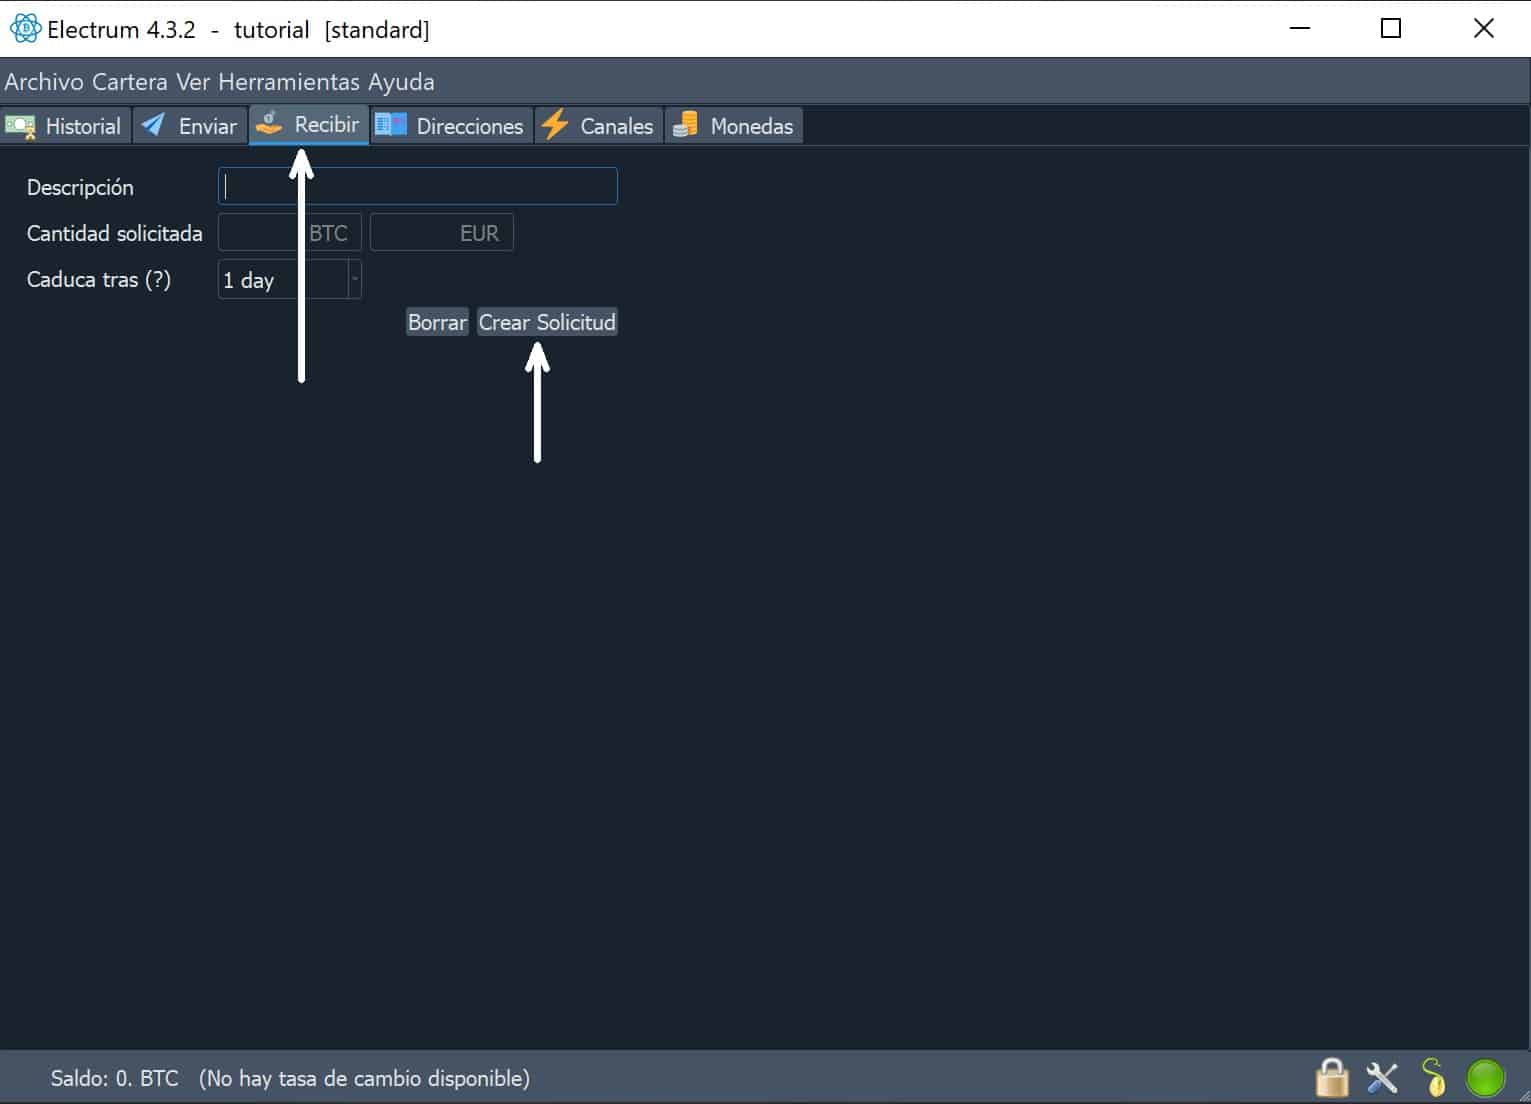
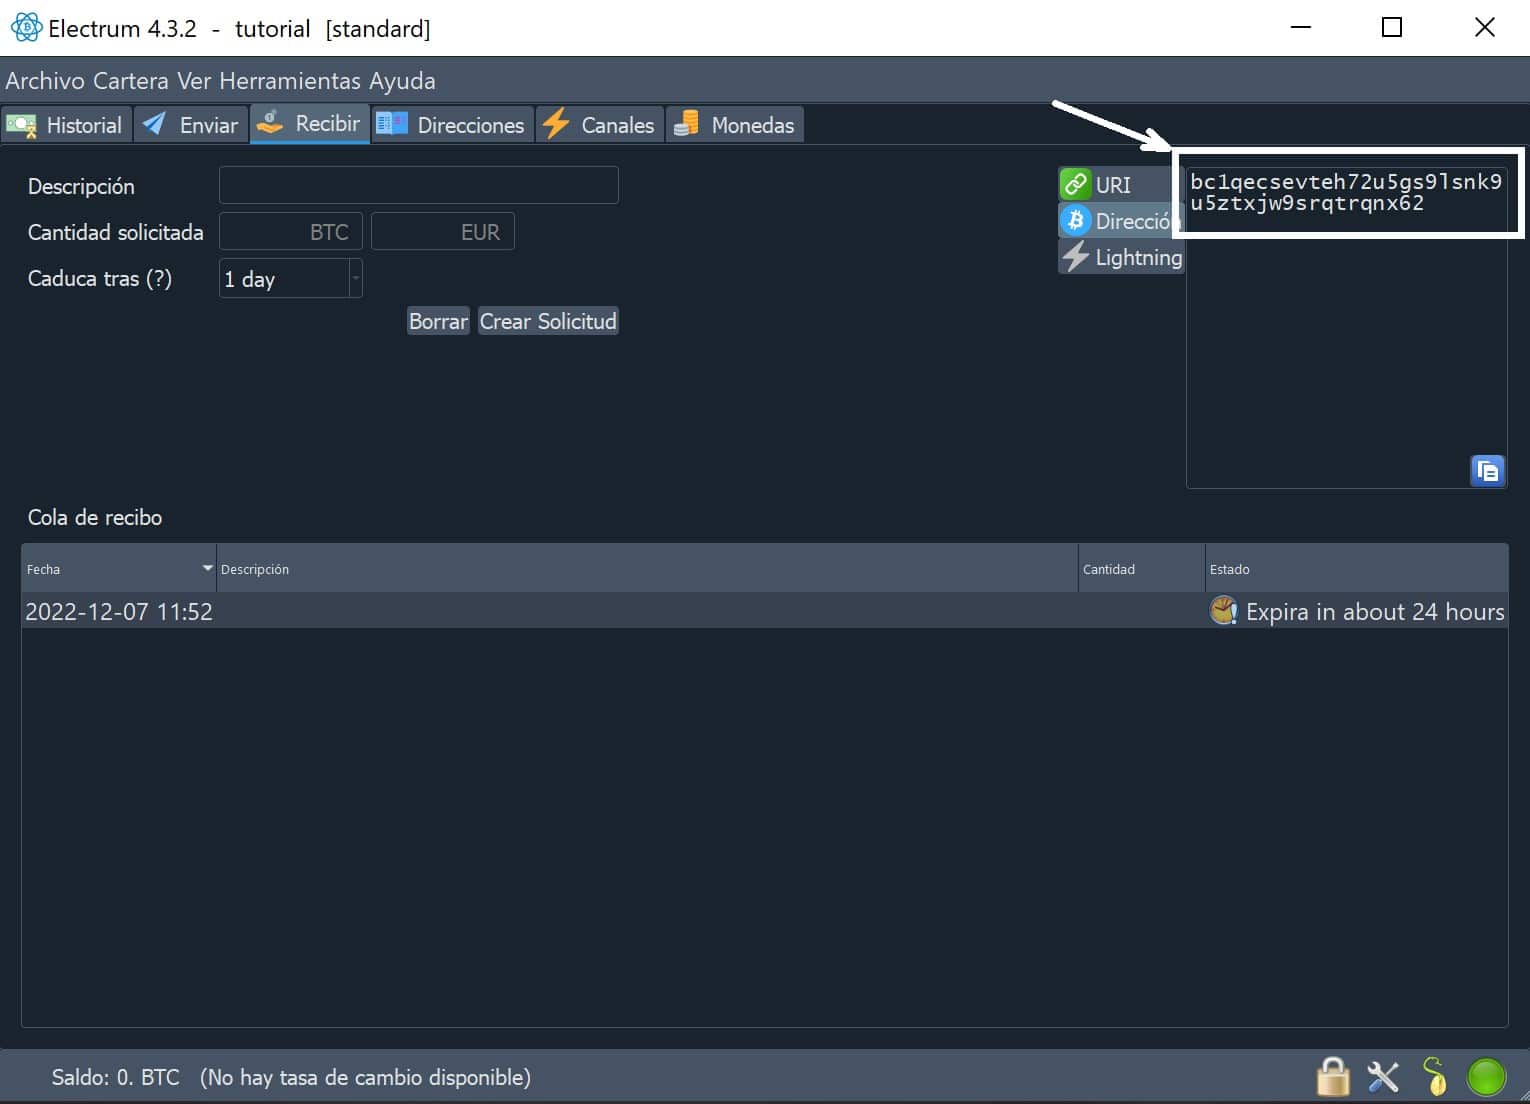
If you need the public address to receive bitcoin in your wallet, just go to the Receive tab and click on Create request.
Now, on the right side you will see a menu. Click on the Address with the Bitcoin logo.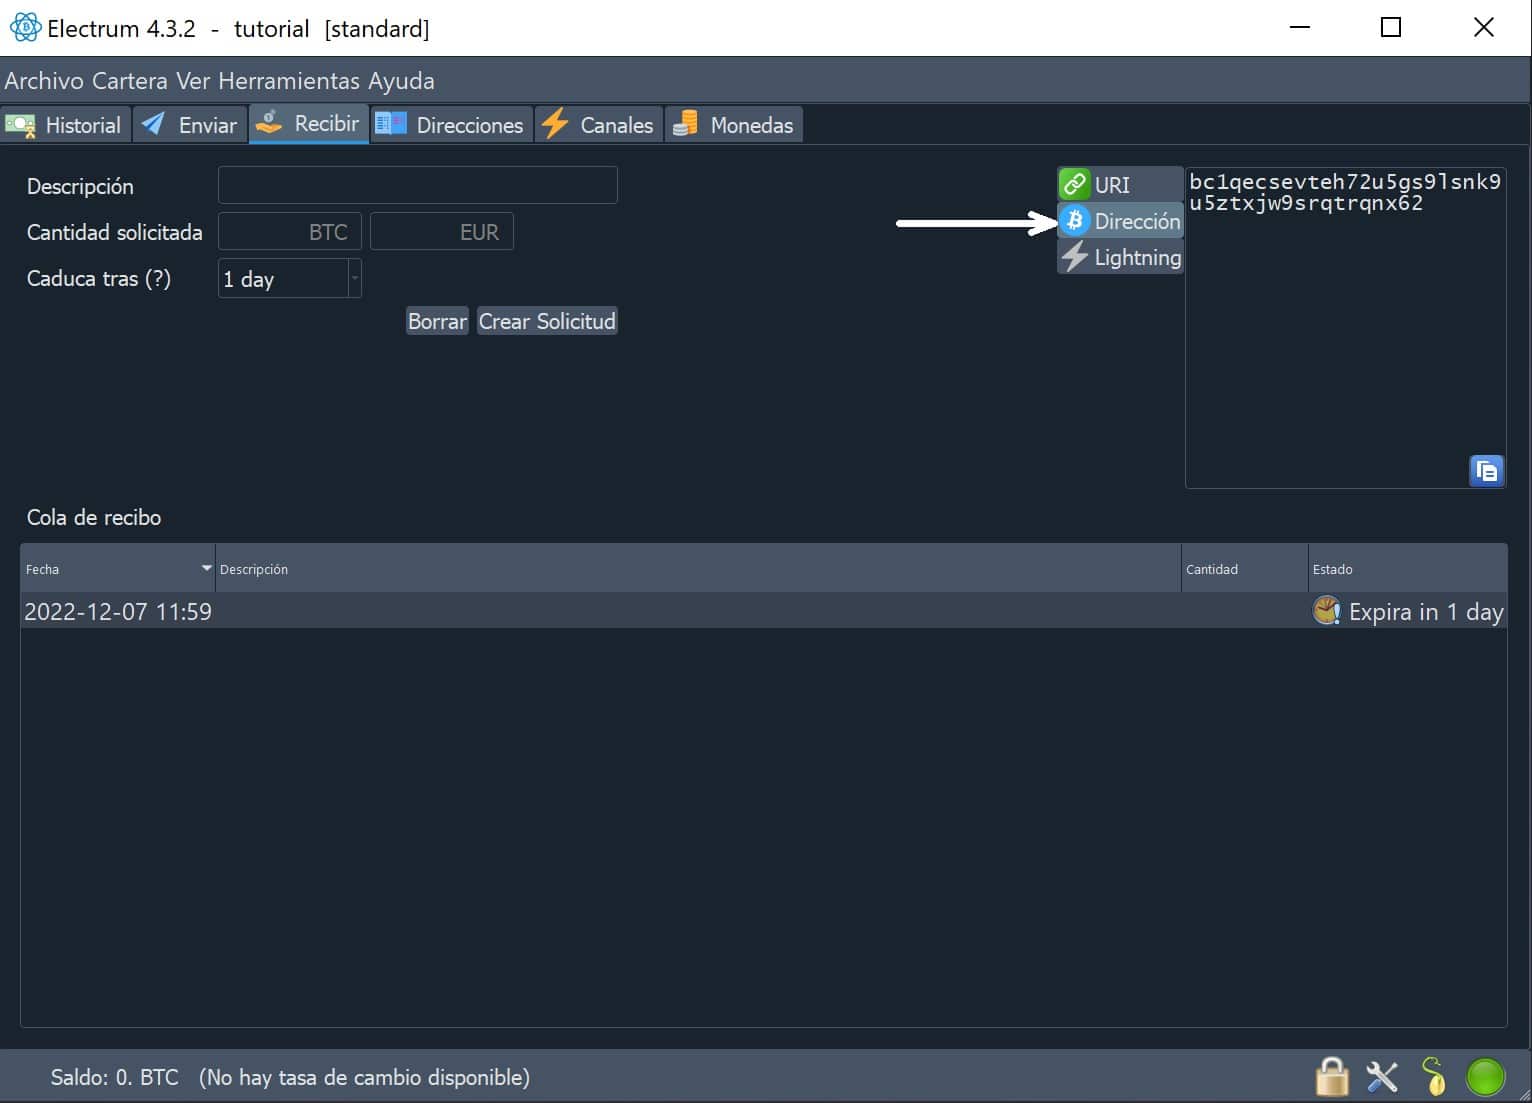
And there we get the address bc1… where we can send bitcoin from another wallet or from an exchange. Do not hesitate to share this public address to anyone who wants to send bitcoin to us.
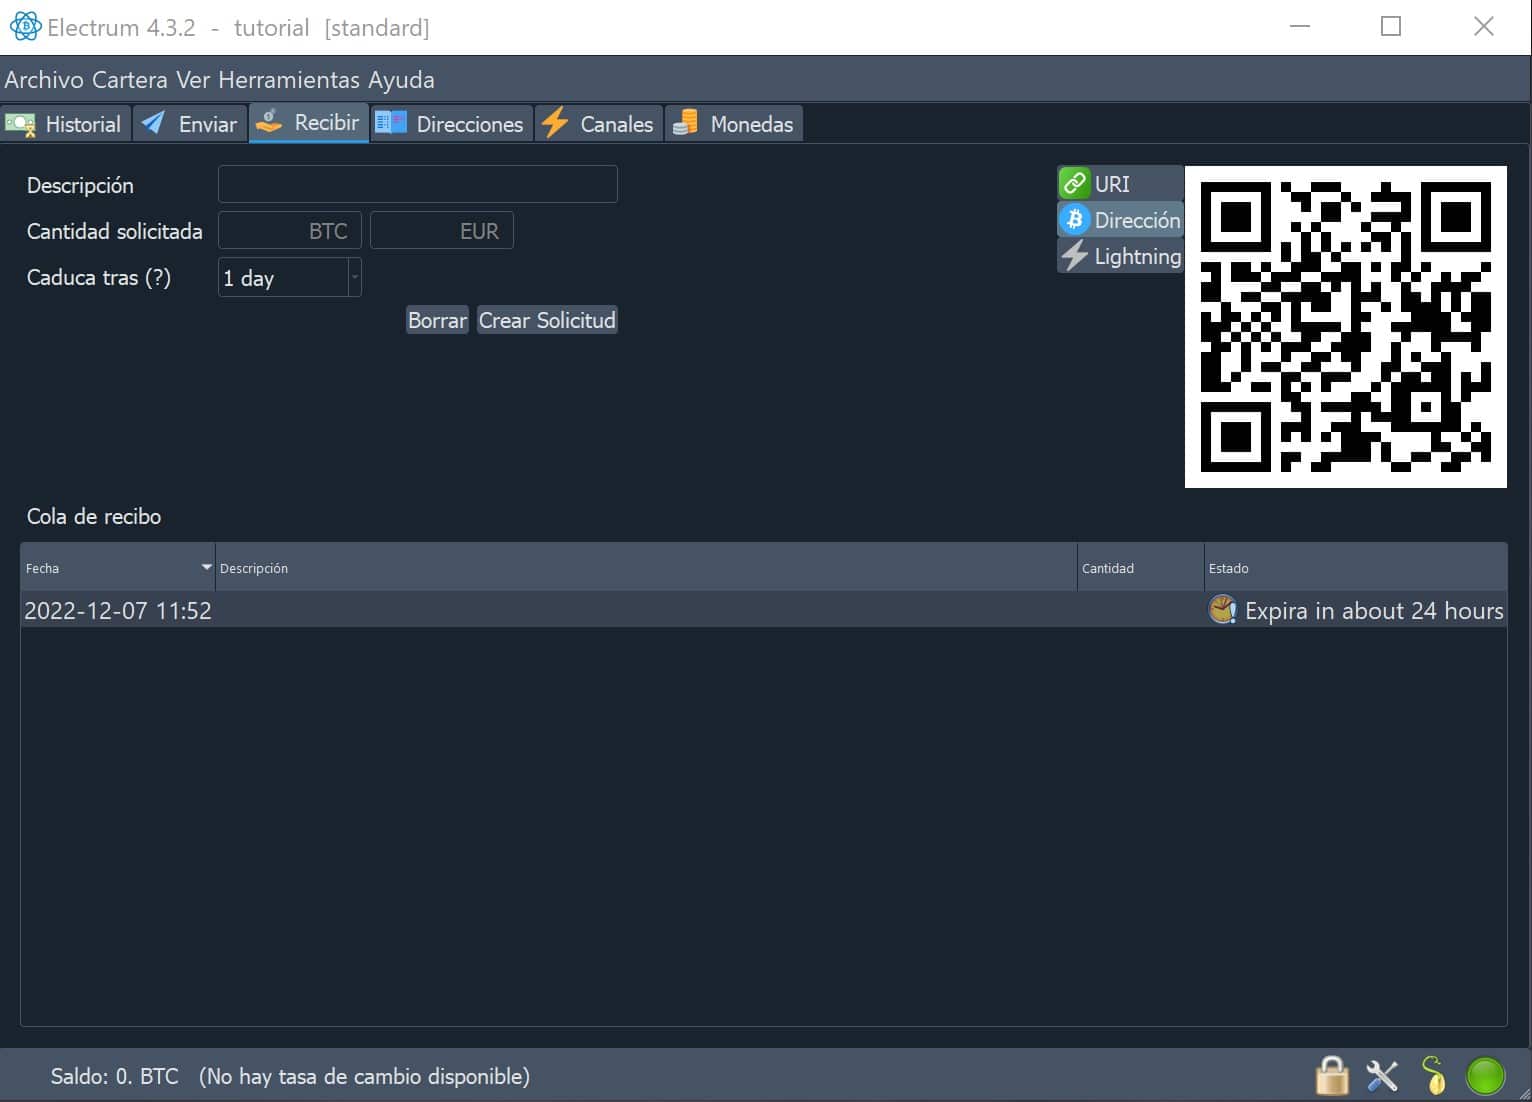
If we click on that address, it turns into a QR code that gives access to the account after being scanned with a camera.
You can save this QR code in any device.
Scanning the QR code means the same as typing down the public address. So the camera of your laptop or cell phone allows you to read the QR code and therefore, send funds.
If you don’t have bitcoin yet, you can buy it on our website by clicking here.
There you can show to the camera the QR code you have saved and it will identify the destination where to send the bitcoin you buy in a simple and secure way.
Withdraw from an exchange
If you already have bitcoin, but it is on an exchange, go to the withdrawal section and copy your public address (which starts with bc1…) or scan the QR code that you obtained from your public address.
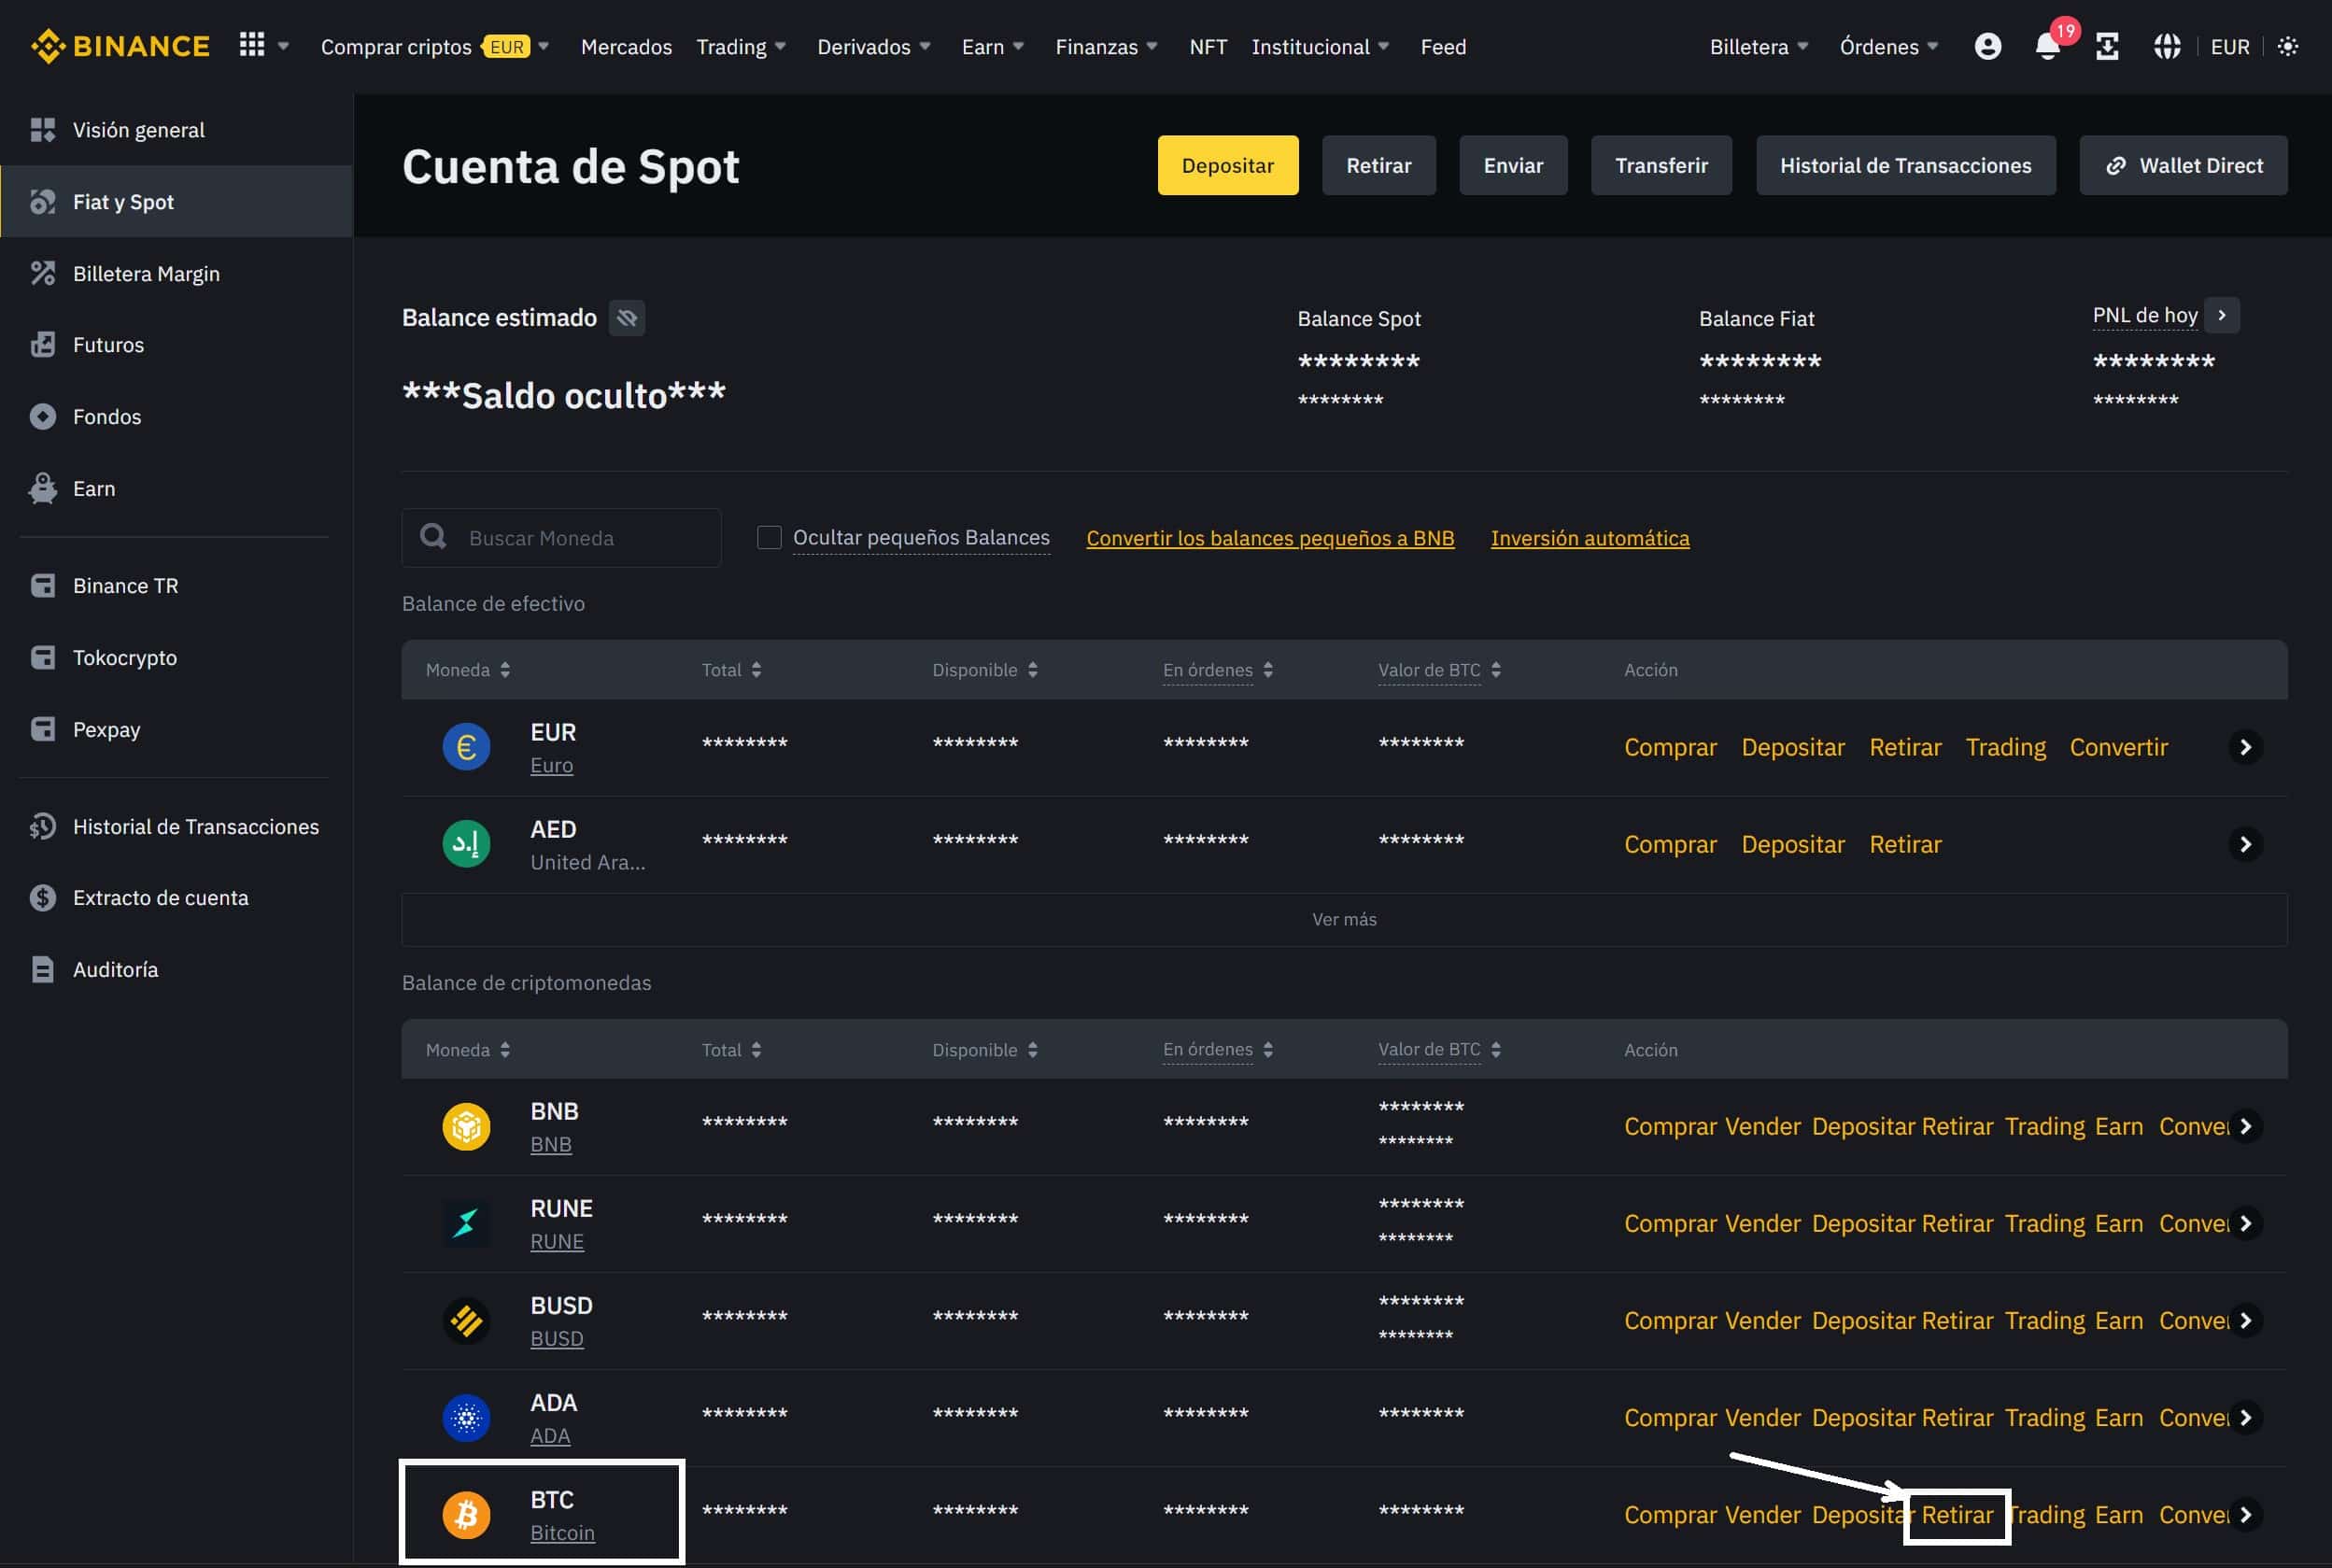
In the case of Binance go to the menu Wallet – Spot Wallet and select Withdraw where it says Bitcoin.
We type or copy and paste our public address (starting with bc1…) and then choose the network.
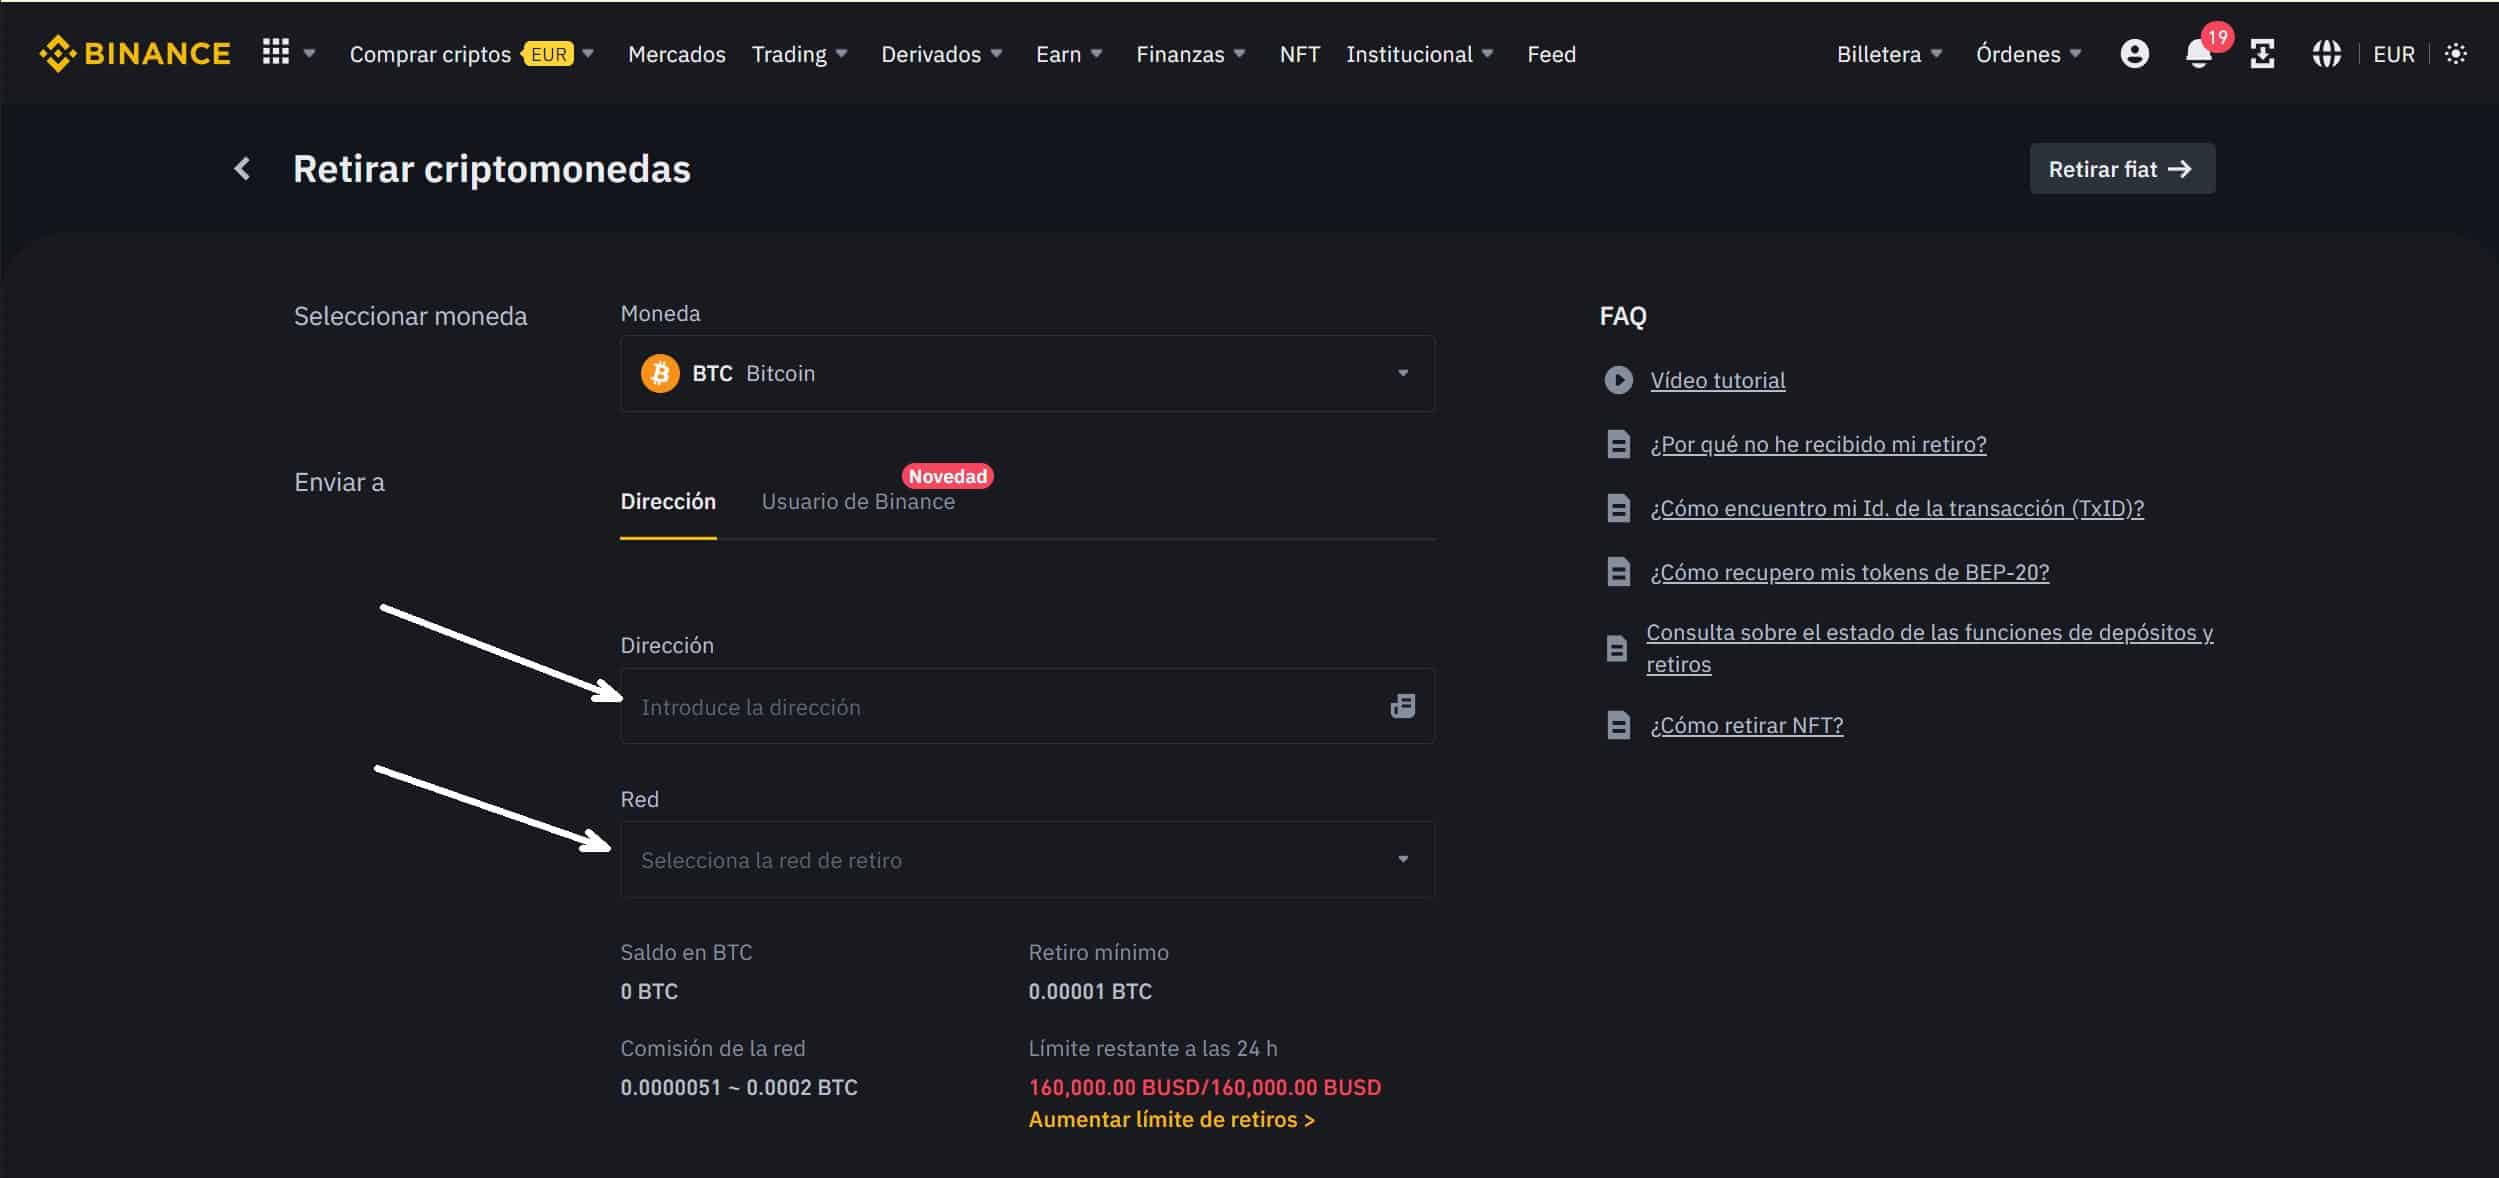
In Net, we chose the BTC network, despite having higher commissions than other listed ones.

You will be asked for confirmations and, when finished, your bitcoin will be sent to the wallet address you have created.
Sending bitcoin from an exchange can take some time, so don’t worry if you still don’t have the funds in your wallet within an hour. The reason why is because of the confirmations needed before your transaction it is done.
You can then go to our website or blockchair and check your wallet balance to verify that you have indeed received it.
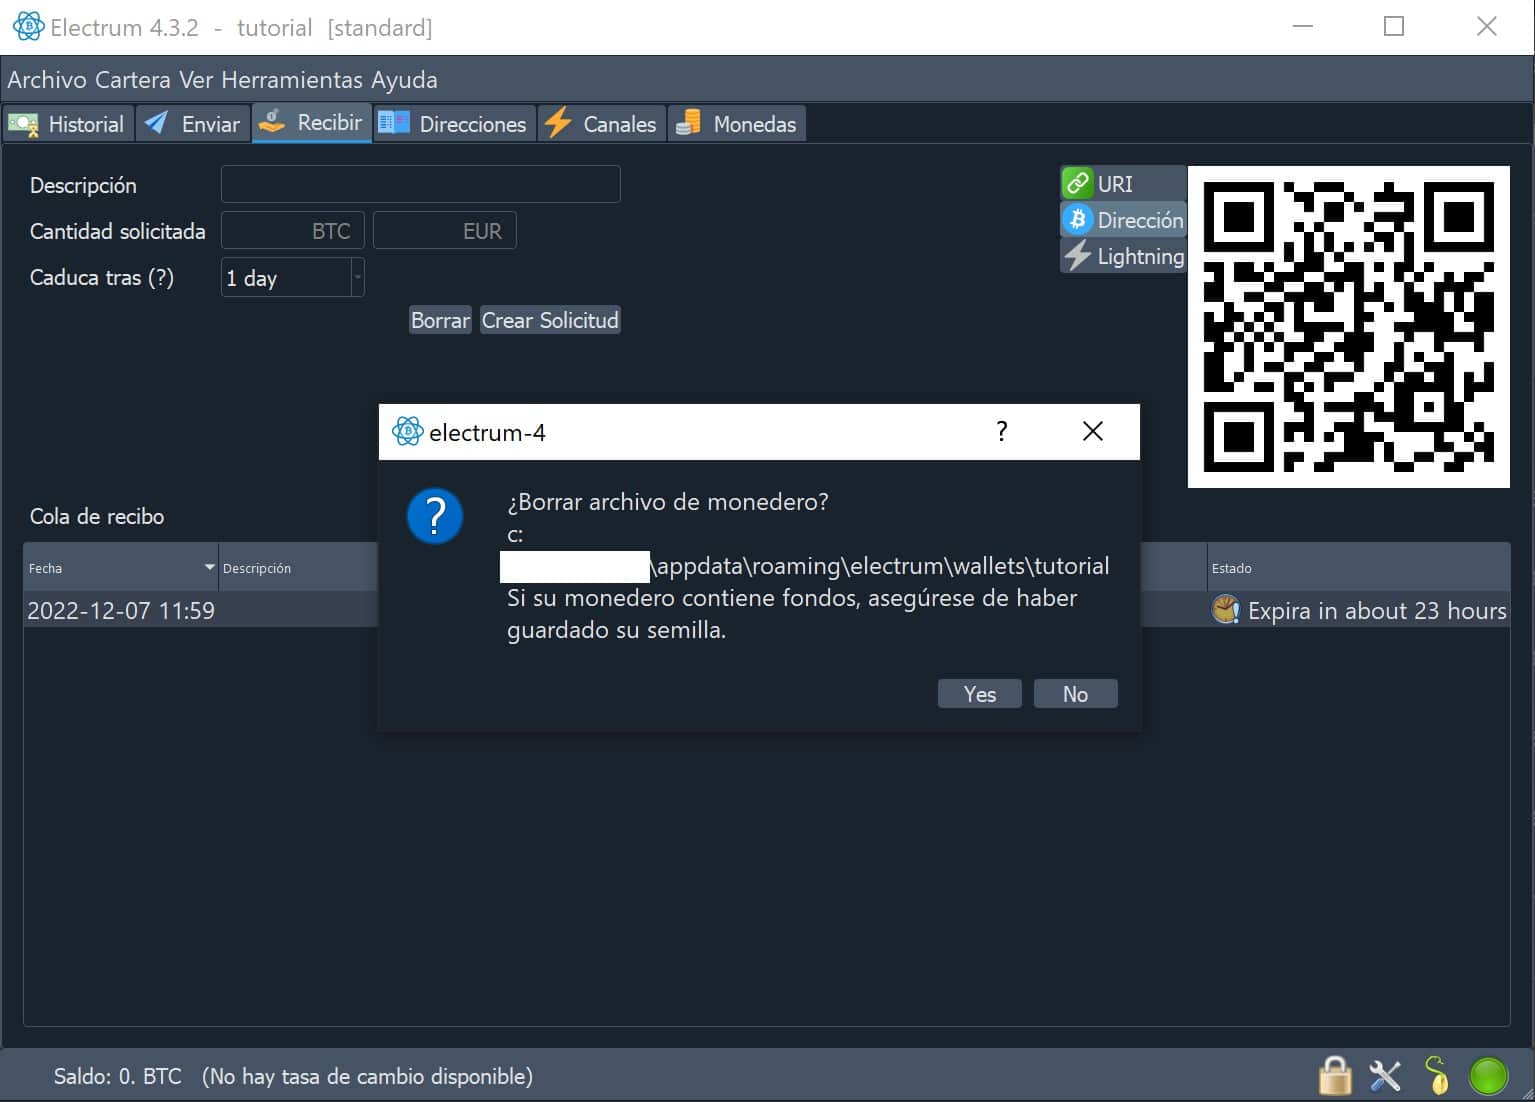
Last and very important step. You must delete your wallet from Electrum so that there is no other copy of your private key (12 words) except the one you have engraved on your DIY Material badge.
On Electrum go to File – Delete and ask for confirmation to delete any trace of that wallet on the computer.
If you already have an Electrum wallet
If the wallet is already created on Electrum, just access the seed phrase (backup phrase) and engrave it on your DIY plate.
To do so, simply follow the steps below:
- Disconnect the Internet access.
- Open the Electrum application in a secure environment as explained above.
- Choose your wallet and enter your password to access.
- Go to the Wallet – Seed menu.
- Enter your wallet password.
- And now you can write down the 12 words of the recovery seed phrase on your DIY Material wallet.
- Remember: If you created this wallet with a passphrase and you don’t remember it, you won’t be able to retrieve it to save it. In this case, it would be better to remove the funds to a temporary wallet, create a wallet from scratch and add a passphrase.
- Now it’s time to write it all down on your DIY Material wallet.
Need help? Leave us your question
To receive immediate help from our community at any time, please join our Telegram group.